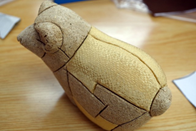


Kimekomi is a technique where a pattern is drawn and then cut onto a surface, such as a soft wood or smooth foam. Fabric is then placed over the pattern and tucked into the cuts.
Kimekomi was developed in the 18th century in Japan as a doll making technique. Kimekomi literally means “to tuck into a groove”. The technique has been passed down through the generations and somewhere along the way someone started making kimekomi balls. With the modern invention of foam balls and the easy access to materials, kimekomi is no longer limited to Japanese artisans.
History
The history of kimekomi dates back to the first half of the eighteenth century. It is believed that while working at the Kamo Shrine in Kyoto, a thrifty craftsman created the first doll of its kind out of fabric scraps and willow tree wood found along the banks of the Kamo River.
Dollmaking, kimekomi style, is still a favorite pasttime for many Japanese craftsmen and women. Kits containing precarved bodies, fabric, heads and hands can be purchased in many, many different styles. If you can find a teacher, you can pursue a series of study that will lead to mastering certification in kimekomi doll making techniques.
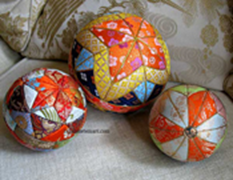
These three balls are very heavy and feel as if they are made on a base of solid wood. I purchased them from an antique seller in Japan who said they date from the 1940’s.
The designs in Japanese Kimekomi have their roots in Japanese culture, but also have a contemporary Western twist. While some of the designs may be found stitched on temari balls, for others we have drawn on the rich American tradition of patchwork quilt blocks to inspire new patterns.
Technique
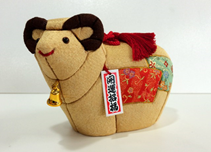
Making a sheep, a zodiac sign.
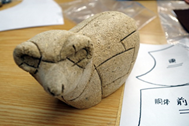
This sheep’s body is made of wood flour compressed with glue.
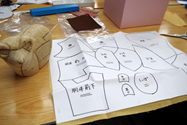
Materials: a body, a sheet of cloth, and draft paper.
The cloth shapes are cut out with the draft paper.
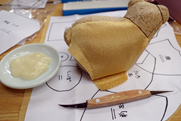
Pad the clothes to the proper body parts.
The tools for this are only glue and an eyelet.
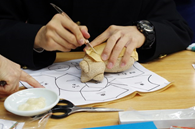
Apply glue with the eyelet, putting it into the gaps.Then, insert the cloth into the gaps so it holds firmly.